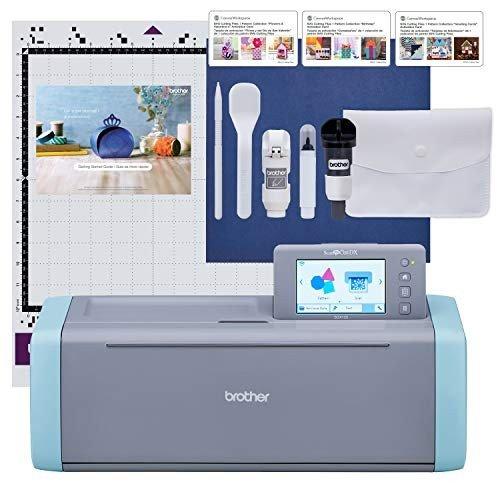
If you're diving into the world of vinyl machines, you're in for a treat! These handy devices can help you create personalized designs, labels, and even home décor that showcases your unique style. But before you jump in, let’s cover some basics to get you started.
First things first, familiarize yourself with your vinyl machine. Each one comes with its own set of features, so take some time to read the manual and explore the settings. Most vinyl machines allow you to cut different materials, from simple vinyl sheets to more complex materials like cardstock. Knowing what your machine can handle will expand your creative possibilities.
Once you're comfortable with the settings, it’s all about choosing the right supplies. You’ll need quality vinyl sheets, cutting mats, and transfer tape. When buying materials, look for vinyl that's compatible with your machine. Many brands offer bundles tailored for specific models, making it easier to get what you need.
Don’t forget to check out design software! Most vinyl machines come with user-friendly programs that let you design or tweak existing templates. If you're unsure where to start, many online resources offer free designs and tutorials to help you create stunning projects. Just remember to start with simple designs as you get the hang of things!
Finally, practice makes perfect. Don’t be discouraged if your first few attempts don’t turn out as expected. Experiment with different settings, materials, and designs. With a little patience, you'll be whipping up fun vinyl projects in no time!
Essential Features to Look For
When you're diving into the world of vinyl machines, it's easy to feel a bit overwhelmed by all the options available. But don’t worry! Let’s break down some essential features you should look for that can make your experience much smoother.
1. Cutting Power: One of the most important features of vinyl machines is their cutting power. Look for machines that can handle a variety of materials, not just vinyl. If you're planning to cut thicker materials or specialty vinyls, a machine with a stronger motor will save you from frustration down the line.
2. User-Friendly Software: The software that comes with vinyl machines can make or break your experience. You want something that’s intuitive and easy to navigate. Many machines offer free software or compatibility with popular design programs, which is a huge plus if you’re tech-savvy.
3. Size and Space: Depending on what projects you have in mind, the size of the vinyl machine matters. If you're working on larger projects, a bigger machine with a larger cutting area is essential. On the other hand, if you're short on space, there are compact options that still pack a punch.
4. Connectivity Options: Check how the vinyl machines connect to your computer. USB is common, but some models offer wireless options, which can be super convenient. Being able to send designs straight to your machine without fussing with cords can save time and hassle.
Step by Step Using Your Vinyl Machine
Using your vinyl machine can feel a bit overwhelming at first, but once you get the hang of it, you’ll see how fun and rewarding it can be! Here’s a simple step-by-step guide to help you navigate through the process.
Step 1: Set Up Your Vinyl Machine
Firstly, make sure your vinyl machine is on a stable table with enough space around it. Plug it in, and connect it to your computer or device via USB or Bluetooth. If you’re using software, install it according to the instructions. This is where the magic begins!
Step 2: Choose Your Design
Now, it’s time to pick a design that excites you! Whether you want to cut shapes, letters, or decals, open your design software and either create your own or select one from the templates available. Don't forget to size it appropriately for your project!
Step 3: Load Your Vinyl
Once your design is ready, it’s time to load your vinyl. Make sure it’s smoothly placed on the cutting mat, and then insert it into the machine. Most vinyl machines have a specific way to load the mat, so take a moment to check the instructions if you’re unsure.
Step 4: Start Cutting
Now comes the exciting part! Click ‘cut’ in your software. Watch as the machine works its magic – it will carefully cut your design out of the vinyl. Once it’s done, gently remove the mat from the machine and peel away the excess vinyl. You’ll be left with your beautiful design, ready for the next step!
By following these straightforward steps, you’ll quickly become more comfortable using vinyl machines and ready to tackle all sorts of fun projects. Happy crafting!
Tips for Caring for Your Vinyl Machine
Caring for your vinyl machines is super important to keep them running smoothly and making great music. Here are some simple tips to help you maintain your machine and extend its lifespan:
By following these tips, you'll help your vinyl machines stay in top shape, so you can enjoy your favorite tunes without a hitch!